How to Convert an Image to Black and White in Photoshop: A Step-by-Step Guide
How to Convert an Image to Black and White in Photoshop
Converting a color image to black and white is an art form that can dramatically transform the mood and impact of your photograph. In this guide, we’ll explore multiple methods to create stunning black and white images using Adobe Photoshop.
Method 1: Grayscale Conversion
The simplest way to convert an image to black and white:
- Open your image in Photoshop
- Go to
Image>Mode>Grayscale - Click “Discard” when prompted about color information
Pros:
- Quick and easy
- Preserves original image structure
Cons:
- Limited control over tonal variations
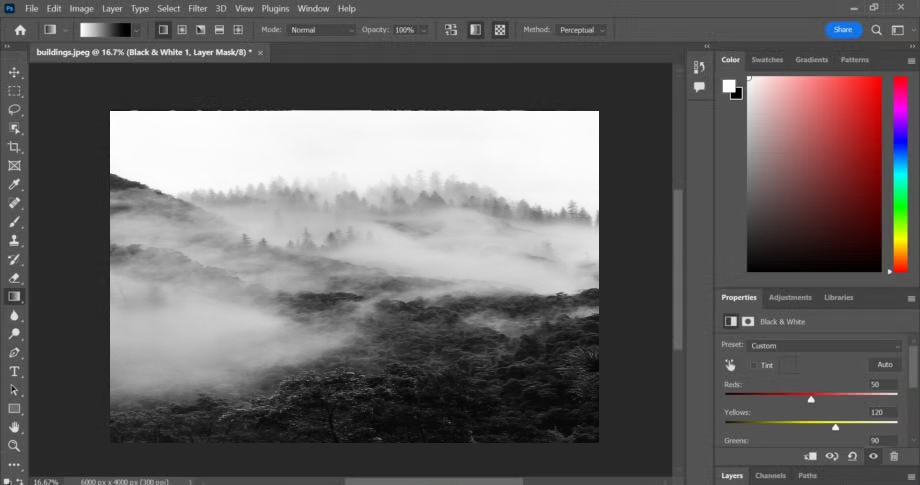
Method 2: Black and White Adjustment Layer
A more sophisticated approach with greater control:
- Click the “Create new fill or adjustment layer” icon at the bottom of the Layers panel
- Select “Black & White”
- Use color sliders to adjust the tonal range of different color channels
- Red slider affects skin tones
- Blue slider impacts sky and water
- Green slider modifies foliage and landscapes
Pro Tip: Experiment with slider positions to create different emotional tones in your image.
Method 3: Channel Mixer
For advanced photographers seeking precise control:
- Add a “Channel Mixer” adjustment layer
- Check the “Monochrome” box
- Adjust Red, Green, and Blue channel percentages
- Aim to keep total percentage around 100% for balanced results
Example Channel Mixer Settings:
- Landscape: Red (30%), Green (60%), Blue (10%)
- Portrait: Red (40%), Green (40%), Blue (20%)
Method 4: Camera Raw Filter
Utilize Camera Raw’s powerful black and white conversion:
- Duplicate your background layer
- Go to
Filter>Camera Raw Filter - Navigate to the HSL/Grayscale tab
- Select “Convert to Grayscale”
- Fine-tune individual color luminance
Advanced Techniques
1. Dodging and Burning
- Use adjustment layers to selectively lighten or darken specific image areas
- Creates depth and emphasizes important image elements
2. Split Toning
- Add subtle color hints to shadows and highlights
- Creates unique, cinematic black and white looks
Common Mistakes to Avoid
- Over-processing and losing image details
- Ignoring original image composition
- Forgetting to adjust contrast after conversion
Conclusion
Black and white conversion is more than a simple color removal—it’s about revealing the soul of an image through tone, texture, and emotion.
Practice Tips:
- Experiment with different conversion methods
- Study classic black and white photographers
- Always work non-destructively using adjustment layers
Happy editing, and may your black and white images tell powerful stories!